4 Steps to MQL Last Touch Attribution in HubSpot
Are you losing sleep wondering if your content is effective? Do you have a lead scoring program? If you answered yes to both of those questions, keep reading:
Would you love to know the answers to any of these questions:
- Which content form submissions generate the most MQLs?
- What’s the last piece of content a contact downloaded that caused them to become an MQL?
- How many leads engaged with a content asset and then became an MQL immediately after?
Imagine how having that intel could impact how you make content decisions!
Follow these four steps to leverage HubSpot’s recent conversion function to track and analyze the content that prospects engage with prior to becoming an MQL.
Step 1 – Create a List
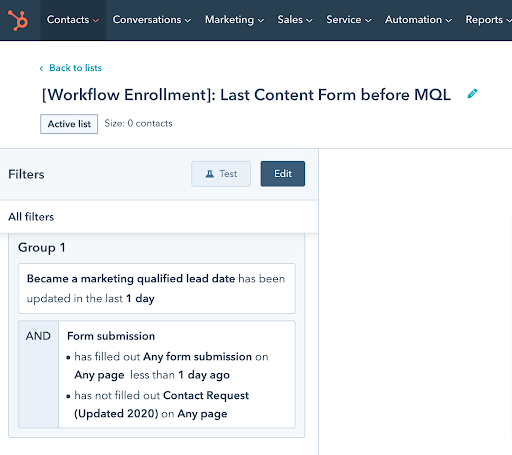
Create a Contact based list > Active, so it automatically updates over time. The purpose of this list is to capture contacts who have recently become an MQL, as a result of downloading content that caused them to cross your lead scoring threshold. You’ll want to exclude anyone who has become an MQL via other means, like Contact Us or Demo forms, imports, etc.
Add these Filters to your Active list:
- Became a marketing qualified lead date has been updated in the last 1 day AND
- Form submission – has filled out any form on any page less than 1 day ago AND
- Exclude non-content download forms (Contact Us, Demo, etc.)
Note: This list will change every day, as it’s only capturing people who have become an MQL as a result of content within the last day. Once they become a member of this list, they’ll be enrolled in the workflow in Step 3. More on that soon.
While this list populates, move on to Step 2.
Step 2 – Create a Custom Property
We’re going to use HubSpot’s Recent Conversion field, which captures the name of the last form that was filled out. Since this field can be overwritten by the next form fill, we’re going to copy its value right after becoming an MQL via lead scoring into a new field so it is preserved.
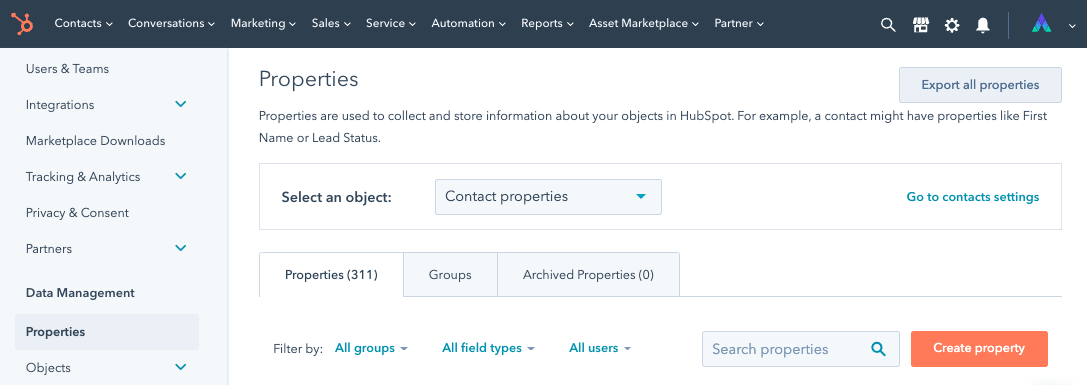
How to create a custom property:
- Settings > Properties > Create Property
- Object Type = Contact; Group = Contact Information
- Label = Content That Influenced Conversion to MQL
- Field Type = Single-line text
- Create
Now that your custom property is created, it’s time to build the workflow.
Step 3 – Build a Workflow
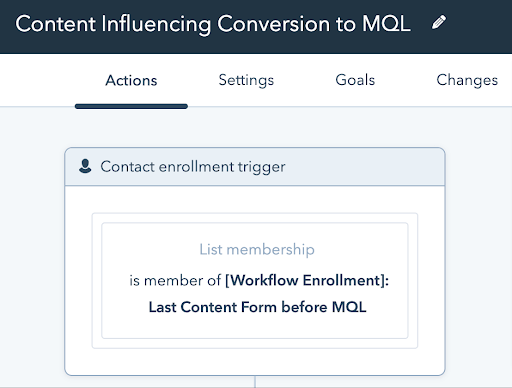
This workflow will put the list and the custom property to work for you, capturing and preserving the last touch conversion information prior to becoming an MQL.
Enroll members of the list in Step 1 in the workflow:
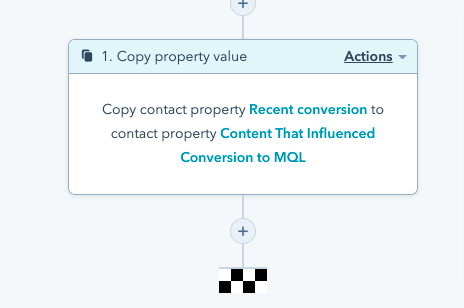
Then, copy their Recent Conversion value into the new property you created, Content That Influenced Conversion to MQL.
As your list populates and contacts are enrolled in the workflow, you’re officially starting to capture and preserve MQL last touch attribution information!
Step 4 – Create a Report
Since you just started collecting data, there won’t be much to look at on a report, but you can get it ready so it’s easy to check on progress in the coming days and weeks.
Start by cloning a Contact report, or creating one from scratch:
- Reports > Create Custom Report
- Single Object > Contact > Create
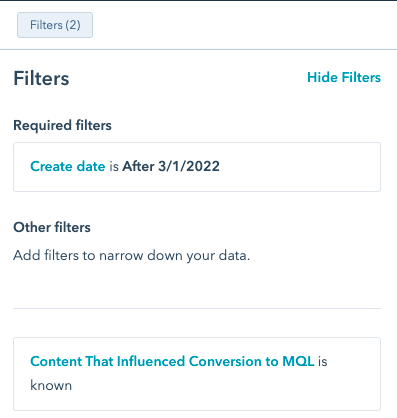
Filters:
- Create date is after (the day before you started capturing data)
- Content That Influenced Conversion to MQL (the custom property you created), value is known
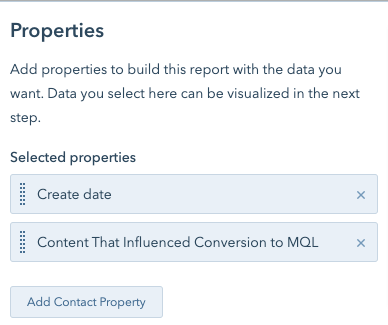
Data:
Add “Content That Influenced Conversion to MQL” as a selected property, so you can use it in the next step:
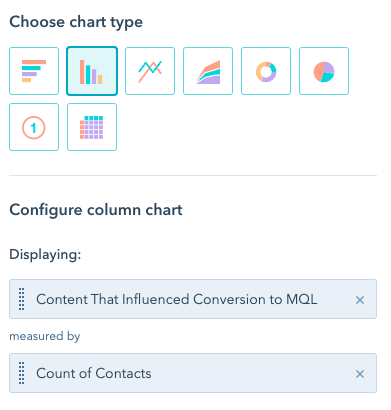
Visualization:
Choose your chart type, and display the custom property you created, Content That Influenced Conversion to MQL.
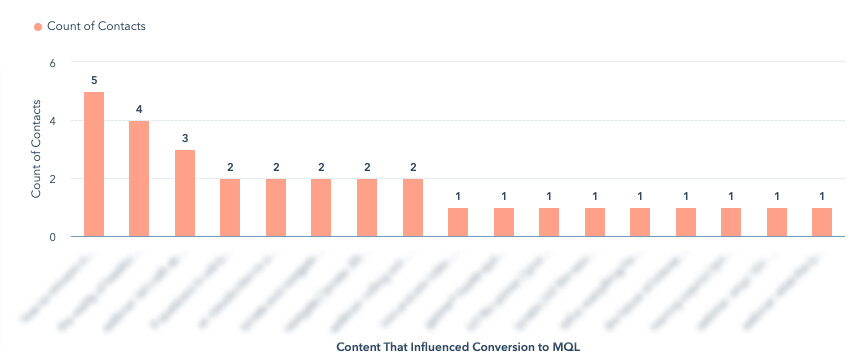
Here’s an example of a bar chart, a few weeks after we started collecting data:
That’s it! Now you can start tracking the content that prospects engage with prior to becoming an MQL through your lead scoring program!
Want more HubSpot Hacks?
How about:
- Marketing Technology
- B2B Demand Generation
- Strategy & Consulting


